

This article is the fourth in the series on how to set up an automated end-to-end workflow for deploying to a Kubernetes cluster. The previous steps accomplished a lot, even if they sound simple. Each involved multiple additional tasks to set up tools and systems, the classic yak shaving scenario. While the first two steps (Create a Python application and Containerize the app) were mostly in the developer realm, the one after that (Deploy to a Kubernetes cluster), straddled both the dev and ops disciplines. The current step, which sets up a CI/CD workflow, gets into the ops area.
These delineations between disciplines should not be thought of as clear or rigid, and depending upon teams and organizations, the lines may be completely blurred or nonexistent. However, with clusters and pipeline steps we also start getting into infrastructure and tooling, and it may not be optimal for members of the development team to stay versed in and to maintain them. That would be my argument for a dedicated devops or infrastructure team.
Back to the code!
The linchpin to CI/CD is a source code management system that either emits events when changes are made or can be polled periodically for changes. At present, systems based on git are the most common. For this demonstration, you need to add the files from the previous steps to a GitHub repository. The directory contents so far should include:
/
├─ helm/
│  ├─ allo-k8s/
│     ├─ charts/
│     ├─ templates/
│     │  ├─ _helpers.tpl
│     │  ├─ deployment.yaml
│     │  ├─ ingress.yaml
│     │  └─ service.yaml
│     ├─ Chart.yaml
│     └─ values.yaml
├─ allo/
│  ├─ __init__.py
│  └─ main.py
├─ Dockerfile
├─ requirements.txt
└─ uwsgi.ini
GitHub Actions are stored in YAML files in the .github/workflows path from root of the repository. The file name containing the actions does not matter and there may be many files. I used main.yaml for the name. Github turns the file into a series of commands that are then executed on a runner, which is probably a virtual machine. You may also specify a container for the steps. This can turn into quite a nested doll situation because actions that we define can in turn also create Docker containers (this is known as Docker-in-Docker, dind, and is similar to how Jenkins also carries out pipeline steps).
on:
  push:
    paths-ignore:
      - "helm/**"
      - "argocd/**"Code language: JavaScript (javascript)
The first section of the file, shown above, tells GitHub when the workflow should run. In this case, that will be whenever there is a git push to the remote repository (or a change on the GitHub site) that is not strictly limited to files in the helm or argocd directories. There is one other exception to this trigger when the GITHUB_TOKEN is used, which we will see further below.
The next section, env, defines environment variables that will be available to any step within the workflow. For this job we define two variables, one with a literal value (ghcr.io) and one that fetches a GitHub parameter (github.repository).
env:
  REGISTRY: ghcr.io
  IMAGE_NAME: ${{ github.repository }}
We finally get to the jobs section. Before looking at the steps, let’s cover the common bootstrapping parts:
jobs:
  allo_k8s_job:
    runs-on: ubuntu-latest
    name: This job creates a Docker image
    permissions:
      contents: write
The first (and only, in this file) job is allo_k8s_job. This is an id field that can be used to refer to this job and can be anything we choose as long as it starts with a letter or _ and contains only alphanumeric characters, -, or _. The next line, runs-on, tells GitHub what runner to use. In addition to ubuntu-latest, we can specify a version, such as ubuntu-22.0, or other operating systems, such as Windows or Mac. The choices are available in the documentation. The name field is for human readable purposes. Finally, permissions tells GitHub what changes, if any, the job or steps can make. Here, contents: write allows the job to change contents of the current repository. We will see why this is necessary below.
One step at a time
The work of GitHub Actions is done in the steps that we include under the steps block. The crucial field here is uses, since that tells GitHub where to find the code for that action. All the steps are hosted on GitHub itself, and information about the action and how to use it can be found in the github Marketplace. The URL for an action’s Marketplace page is: https://github.com/marketplace/actions/<action>. For example, the “built-in” (that is, provided by GitHub itself) action, actions/checkout is at https://github.com/marketplace/actions/checkout. For actions that are created by others, if the marketplace page is not helpful, we can visit the repository and look at the source code. The URL pattern is similar to any GitHub repo: https://github.com/<org>/<repo>. For example, the actions/checkout code is at the repository at https://github.com/actions/checkout.
The rest of this section lists each step of the workflow and some discussion about the step. The purpose is to explain why that action was included and any relevant details. A deeper dive into each one would be far beyond the scope of this article.
Act 1
Step 1: Check out the source code
      - name: Checkout
        uses: actions/checkout@v3
        with:
          token: ${{ secrets.GITHUB_TOKEN }}
Since the workflow will need access to the contents of the repo in order to build the container image, the purpose of this step is to fetch those contents. It will use the current branch, so we do not need to specify it. It uses GITHUB_TOKEN as credentials to access the repository. This is a special credential that is created by GitHub for every workflow.
Step 2: Bandit Action
      - name: Bandit Action
        uses: mdegis/bandit-action@v1.0
        id: bandit
        with:
          GITHUB_TOKEN: ${{ secrets.GITHUB_TOKEN }}
          path: "allo"
          level: high
          confidence: high
          exit_zero: trueCode language: JavaScript (javascript)
This is the “Sec” part of this DevSecOps workflow. Bandit is a Python vulnerability scanner that performs static code analysis, or static application security testing (SAST). At present the action is invoked with exit_zero: true, meaning that it will return a status of 0 even if it finds any vulnerabilities, and thus it will not stop the workflow.
Steps 3 and 4: Change repo name to lowercase
      - name: Repo name lowercase
        id: convertRepository
        uses: ASzc/change-string-case-action@v5
        with:
          string: ${{ env.IMAGE_NAME }}
      - id: echoRegistryName
        run: echo ${{ steps.convertRepository.outputs.lowercase }}Code language: PHP (php)
A long time ago I created my GitHub account with mixed case letters for my username. This action is simply to convert everything to lowercase, since the GitHub registry only wants lowercase.
Act 2
Step 5: Log into Registry
      - name: Log into registry ${{ steps.convertRepository.outputs.lowercase }}
        uses: docker/login-action@v1
        with:
          registry: ${{ env.REGISTRY }}
          username: ${{ github.actor }}
          password: ${{ secrets.CLASSIC_TOKEN }}
When we pushed the Docker image to the GitHub registry manually, we first had to authenticate. This step accomplishes the same thing.
Steps 6 and 7: Set up Docker build environment
      - name: Set up QEMU
        uses: docker/setup-qemu-action@v2
      - name: Setup Docker buildx
        uses: docker/setup-buildx-action@v2
        with:
          platforms: linux/amd64,linux/arm64Code language: JavaScript (javascript)
QEMU is an open-source project for creating virtual machines. It is used by Docker for multi-platform builds. The second action above sets up Docker to use buildx to build the images for both Intel/AMD-compatible and Apple Silicon CPUs.
Step 8: Extract Docker Metadata
      - name: Extract Docker metadata
        id: meta
        uses: docker/metadata-action@v4
        with:
          images: ${{ env.REGISTRY }}/${{ steps.convertRepository.outputs.lowercase }}
          tags: |
            type=ref,event=branch
            type=ref,event=pr
            type=semver,pattern={{version}}
            type=semver,pattern={{major}}.{{minor}}
          github-token: ${{ secrets.GITHUB_TOKEN }}
This pulls together information such as github repository, branch, pull-request and reference tags, which can then be used to tag images in various ways (or even for non-Docker purposes, really).
Act 3
Step 9a: Build and Push Versioned Docker Image
      - name: Build and Push Versioned Docker Image
        id: build-and-push
        uses: docker/build-push-action@v4
        if: ${{ github.ref != 'refs/heads/main' }}
        with:
          context: ./
          push: true
          tags: ${{ env.REGISTRY }}/${{ steps.convertRepository.outputs.lowercase }}:${{ steps.meta.outputs.version }}
          labels: ${{ steps.meta.outputs.labels }}
          platforms: linux/arm64,linux/amd64Code language: JavaScript (javascript)
Now we come to one of the real workhorses in the flow. This step will build a Docker image. The if conditional check means this runs when the branch is not main. Using a condition can let you configure different builds, such as using different Dockerfiles, for different environments.
Step 9b: Build and Push Latest Docker Image
      - name: Build and Push Latest Docker Image
        id: build-and-push-latest
        uses: docker/build-push-action@v4
        if: ${{ github.ref == 'refs/heads/main' }}
        with:
          context: ./
          push: true
          tags: ${{ env.REGISTRY }}/${{ steps.convertRepository.outputs.lowercase }}:latest, ${{ env.REGISTRY }}/${{ steps.convertRepository.outputs.lowercase }}:${{ steps.meta.outputs.version }}
          labels: ${{ steps.meta.outputs.labels }}
          platforms: linux/arm64,linux/amd64
Code language: JavaScript (javascript)
This step runs when the branch is main. It is similar to the step before it but this one also adds the latest tag to the image. Many organizations choose to use a more explicit method for specifying production images, especially in a GitOps configuration, so this is mainly for illustrating how to configure alternatives. The step also pushes a branch tag.
Steps 10 and 11: Update Image Version and Commit changes
      - name: Update Image Version
        id: imgupd
        uses: mikefarah/yq@v4.34.1
        with:
          cmd: >-
            yq eval '.image.repository = "${{ env.REGISTRY }}/${{ steps.convertRepository.outputs.lowercase }}" |
            .image.tag = "${{ steps.meta.outputs.version }}" |
            .image.digest = "${{ steps.build-and-push.outputs.digest || steps.build-and-push-latest.outputs.digest}}"'
            -i helm/values.yaml
      - name: Commit changes
        uses: stefanzweifel/git-auto-commit-action@v4
        with:
          commit_message: Apply image name changesCode language: PHP (php)
These steps enable the gitops portion of the overall process. They use community-provided actions. The first one updates the helm chart’s values.yaml file with the image name, tag and digest. These values will be different according to the branch. The next step commits the changes back to the repository. Since the checkout step used GITHUB_TOKEN to check out the code, this commit will not trigger a new build. That is a special property of that token.
Lights, Camera…
Now that we have looked at the components of the workflow, here is the complete file.
on:
  push:
    paths-ignore:
      - "helm/**"
      - "argocd/**"
env:
  REGISTRY: ghcr.io
  IMAGE_NAME: ${{ github.repository }}
jobs:
  allo_k8s_job:
    runs-on: ubuntu-latest
    name: This job creates a Docker image
    permissions:
      contents: write
    steps:
      - name: Checkout
        uses: actions/checkout@v3
        with:
          token: ${{ secrets.GITHUB_TOKEN }}
      - name: Bandit Action
        uses: mdegis/bandit-action@v1.0
        id: bandit
        with:
          GITHUB_TOKEN: ${{ secrets.GITHUB_TOKEN }}
          path: "allo"
          level: high
          confidence: high
          exit_zero: true
      - name: Repo name lowercase
        id: convertRepository
        uses: ASzc/change-string-case-action@v5
        with:
          string: ${{ env.IMAGE_NAME }}
      - name: Log into registry ${{ steps.convertRepository.outputs.lowercase }}
        uses: docker/login-action@v1
        with:
          registry: ${{ env.REGISTRY }}
          username: ${{ github.actor }}
          password: ${{ secrets.CLASSIC_TOKEN }}
      - name: Set up QEMU
        uses: docker/setup-qemu-action@v2
      - name: Setup Docker buildx
        uses: docker/setup-buildx-action@v2
        with:
          platforms: linux/amd64,linux/arm64
      - name: Extract Docker metadata
        id: meta
        uses: docker/metadata-action@v4
        with:
          images: ${{ env.REGISTRY }}/${{ steps.convertRepository.outputs.lowercase }}
          tags: |
            type=ref,event=branch
            type=ref,event=pr
            type=semver,pattern={{version}}
            type=semver,pattern={{major}}.{{minor}}
          github-token: ${{ secrets.GITHUB_TOKEN }}
      - name: Build and Push Versioned Docker Image
        id: build-and-push
        uses: docker/build-push-action@v4
        if: ${{ github.ref != 'refs/heads/main' }}
        with:
          context: ./
          push: true
          tags: ${{ env.REGISTRY }}/${{ steps.convertRepository.outputs.lowercase }}:${{ steps.meta.outputs.version }}
          labels: ${{ steps.meta.outputs.labels }}
          platforms: linux/arm64,linux/amd64
      - name: Build and Push Latest Docker Image
        id: build-and-push-latest
        uses: docker/build-push-action@v4
        if: ${{ github.ref == 'refs/heads/main' }}
        with:
          context: ./
          push: true
          tags: ${{ env.REGISTRY }}/${{ steps.convertRepository.outputs.lowercase }}:latest, ${{ env.REGISTRY }}/${{ steps.convertRepository.outputs.lowercase }}:${{ steps.meta.outputs.version }}
          labels: ${{ steps.meta.outputs.labels }}
          platforms: linux/arm64,linux/amd64
      - name: Update Image Version
        id: imgupd
        uses: mikefarah/yq@v4.34.1
        with:
          cmd: >-
            yq eval '.image.repository = "${{ env.REGISTRY }}/${{ steps.convertRepository.outputs.lowercase }}" |
            .image.tag = "${{ steps.meta.outputs.version }}" |
            .image.digest = "${{ steps.build-and-push.outputs.digest || steps.build-and-push-latest.outputs.digest}}"'
            -i helm/values.yaml
      - name: Commit changes
        uses: stefanzweifel/git-auto-commit-action@v4
        with:
          commit_message: Apply image name changesCode language: YAML (yaml)
Before running this workflow, you need to create a personal access token that will allow the workflow to upload the Docker image to the image repository. Be sure to give the token the write:packages scope so that it can push the image to the registry. Once the token secret is generated, save it to a local secrets store so that you can access it later. If the secret is lost, you will need to generate a new token.
Next, in the Settings tab for your project repository, go to the Secrets and variables menu option on the left, and then click on Actions. Create a new repository secret called CLASSIC_TOKEN and give it the value of the token you created above. Now you are ready to create the pipeline.
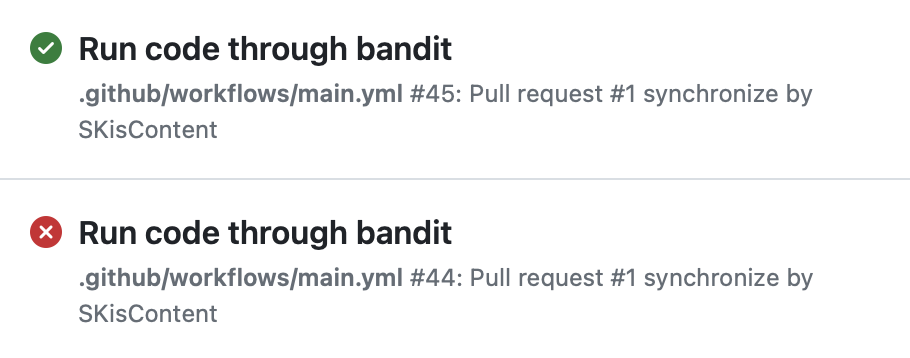
Commit the .github/workflows/main.yaml file and push the code to the Github remote repository. Once Github becomes aware of the file, it will then auomatically start the workflow. Go to the Actions tab of the repository page. The file should be listed there. Click on the file name to see the workflow executions. Click on the latest execution to see the results of the individual steps. If all has gone well, the job was successful and it shows a green check mark as opposed to red x as in the image below:
Click on the job summary and you should see the results of the job’s run, including all the steps:
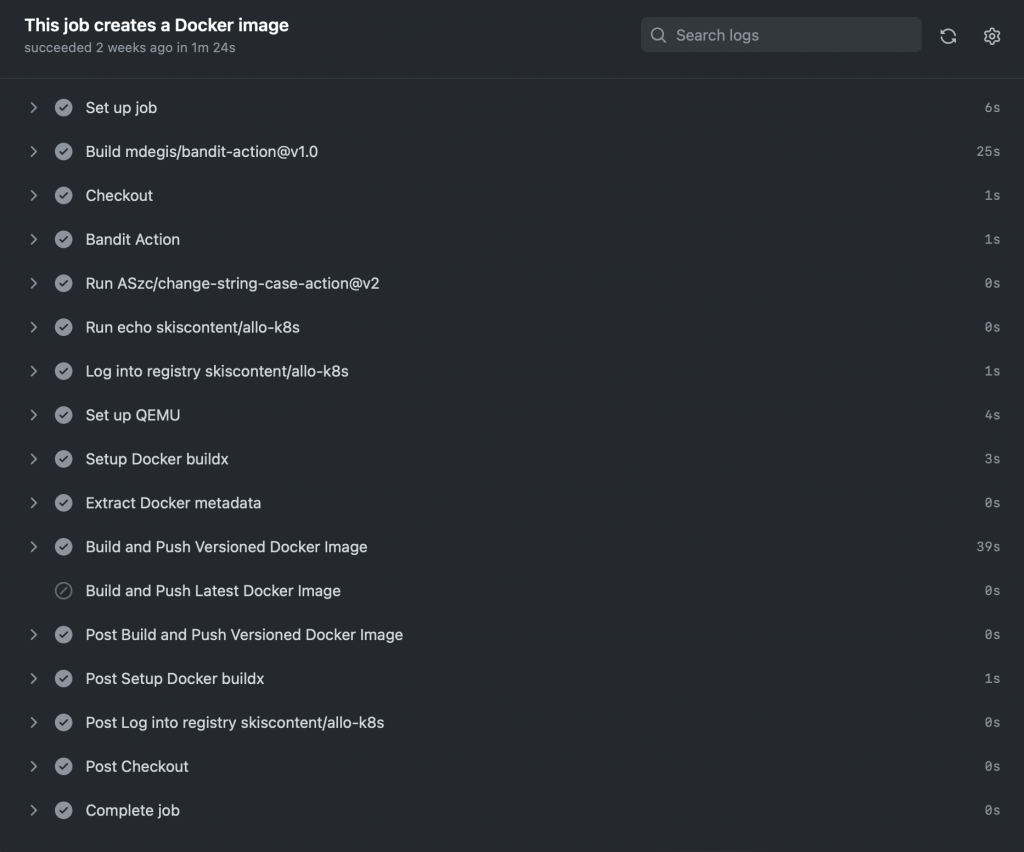
Clicking on any of the individual steps will show more details of that step, including any errors. If the run was not successful, use this information to troubleshoot.
Hopefully you got a successful completion. Congratulations, that’s win number four!
The steps discussed above can get a CI workflow started in most circumstances. This workflow can be modified as development needs mature and new requirements present themselves. For one thing, a step to run tests would be present in a real situation, while it was not included here. That might even be expanded to include integration testing for pull requests to main, but only unit testing for other branches. Or you can also create entirely new workflows, such as building different client apps for Android, iOS, etc.
In the next article, we will set up the last stage of the workflow, which will take the image from the registry and deploy it to Kubernetes.