

Now that we have a process that automatically builds a container image whenever changes are committed to the git repository, we need a way to get those changes out, either into a development or test environment, or to the production environment. In the gitops world, a deployment is also initiated by a change to the git repository. The repository is the “source of truth” for which image should be deployed. Our CI workflow takes care of updating the repository with the image tag that needs to be deployed. The last piece we need is a mechanism that performs the deployment. In this demonstration, we will use ArgoCD.
ArgoCD is a continuous delivery tool for Kubernetes deployment that has a nice user interface but can also be driven from the command line. If you have not already set it up, go ahead and install it before continuing. The server can be installed in the same cluster where the application will be deployed. While it is not necessary, you may want to install the local client as well. For this demo we will use kubectl to configure our applications and we will check the results in the UI.
Once Argo is installed, test whether you are able to connect to the server. If you don’t have ingress set up, use port forwarding:
kubectl port-forward service/argocd-server -n argocd 8000:80Now Argo will be available on http://localhost:8000. Enter the URL in a browser to check that it loads. Sign in to Argo. The username is admin and the password is in the Kubernetes secret argocd-initial-admin-secret in the argocd namespace (presuming the default installation). To retrieve the password from the command line, use:
kubectl get secret/argocd-initial-admin-secret -n argocd -o=jsonpath="{.data.password}"|base64 -dCode language: JavaScript (javascript)To log in from the command line, use argocd login http://localhost:8000. You will be prompted for the username and password.
Create the Application
Argo creates a Kubernetes custom resource definition of kind: Application. We will use this CRD to tell Argo about our application. For that we need to create an Application manifest file. Call it development.yaml and put it in a directory called argocd off the project root directory:
apiVersion: argoproj.io/v1alpha1
kind: Application
metadata:
  name: allo-k8s-development
spec:
  destination:
    namespace: allo-k8s-development
    server: https://kubernetes.default.svc
  project: default
  source:
    path: helm/allo-k8s
    repoURL: https://github.com/skiscontent/allo-k8s.git
    targetRevision: main
  syncPolicy:
    automated:
      prune: true
      selfHeal: true
    syncOptions:
      - CreateNamespace=true
Code language: YAML (yaml)
Let’s review some of the more salient parts of the file. On line 7, the namespace field tells ArgoCD which namespace to deploy the application. The CreateNamespace=true option on line 19 tells ArgoCD to create the namespace if it does not exist. The server field on line 8 tells ArgoCD where to find the API controller of the cluster. This should match the clusters[].cluster.server field in the kubeconfig file, but if the ArgoCD server is running on the same cluster to which you are deploying, this value is https://kubernetes.default.svc. The fields in the source block tell Argo where to find the “traditional” manifests for the service; that is, the deployment, stateful set, service, ingress, etc. files. This can be a directory containing a helm chart, as in our case, and ArgoCD will figure it out. The path and repoURL fields should be self-evident, the targetRevision field is the branch we want to use, asltw.
In order deploy the app, issue the command below in a terminal:
kubectl apply -f argocd/development.yaml -n argocdAfter a few moments, the ArgoCD UI should show the allo-k8s-deployment application in a healthy state:
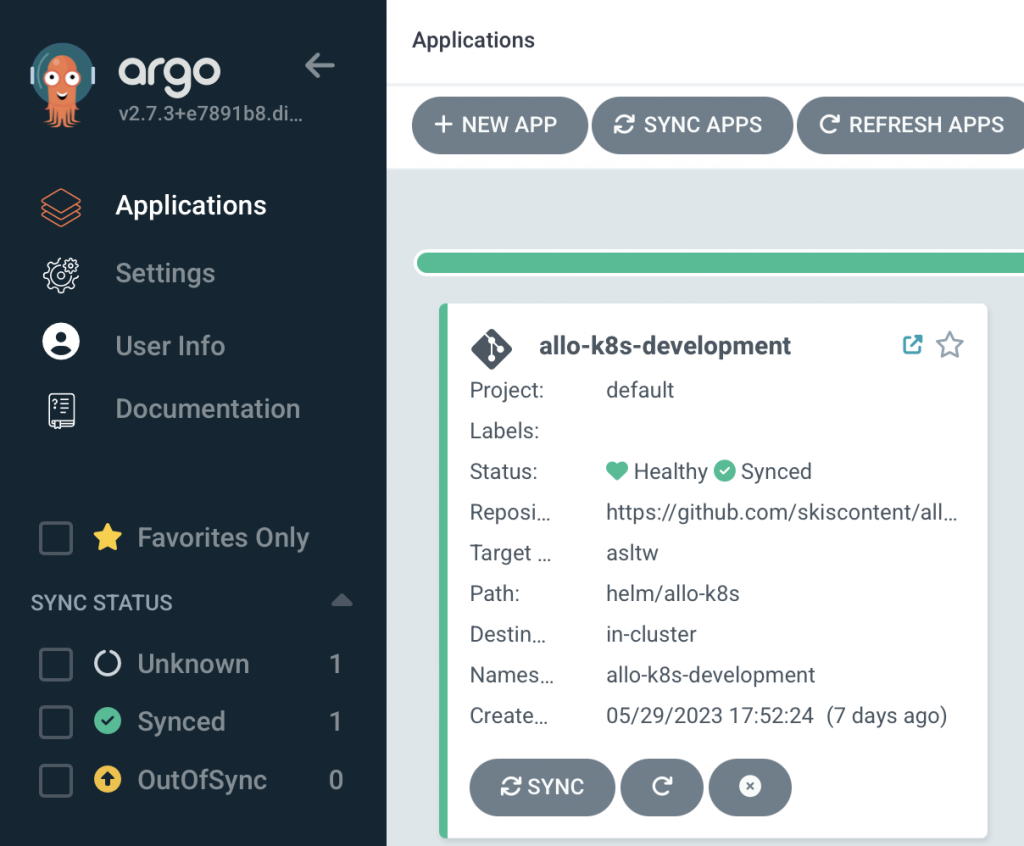
If the port-forward to the allo-k8s-development app is still in place, verify that it is still running and nothing has changed by visiting or refreshing the page to http://localhost:8080.
Awesome sync
We now have all the pieces in place for an automated deployment whenever we commit and push a change. Test it out. Pull the latest changes from the GitHub remote repo, change the hello message in the main.py file, then commit it and push the change to the remote repo. Or run these commands (presuming your hello message is “Hello, world!”).
git pull --ff
sed -ei "s/world/everyone/" allo/main.py
git commit allo/main.py -m "Change the message"
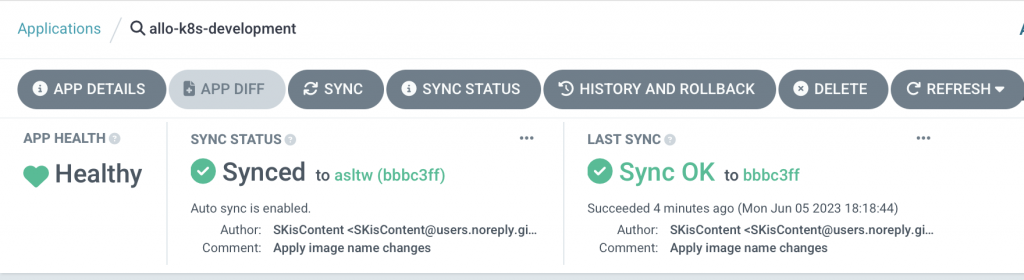
git pushCode language: JavaScript (javascript)If you go over to your GitHub repository page and check the Actions tab, you should see the build workflow run to completion. Then look at the ArgoCD UI. The default sync interval is 3 minutes, so after about that much time, you should see the sync status change. Next to the status, ArgoCD shows the short git commit hash, so you can tell which commit it has deployed.
Now for the final reveal. Head over to the browser pointing to http://localhost:8080 and refresh the page, and you should see the new message.
Small win number five and a big win for finishing the project!
The articles in this series included a high-level view of several tasks that need to be completed in order to set up an end-to-end automated workflow. A real-world workflow may include several additional steps, such as testing, code linting, additional security checks, etc. However, by breaking the workflow into steps and working on small wins, we see how to accomplish big projects.
I hope you found this series helpful. Do leave a comment with any suggestions or feedback.