
As a Mac user with concerns about privacy and data security, I have used a personal firewall on my laptop for many years. The specific one I use is Little Snitch. Normally I don’t name products but I like it so much that I have no problem making this exception. The way it works is that whenever a program wants to connect to a network address, if there isn’t a rule already covering that connection, Little Snitch shows a popup dialog asking whether to: allow or deny, temporarily or permanently, and many combinations of host address, port, domain. This lets me know whenever a web page or an app is trying to connect to a location that is out of the ordinary.
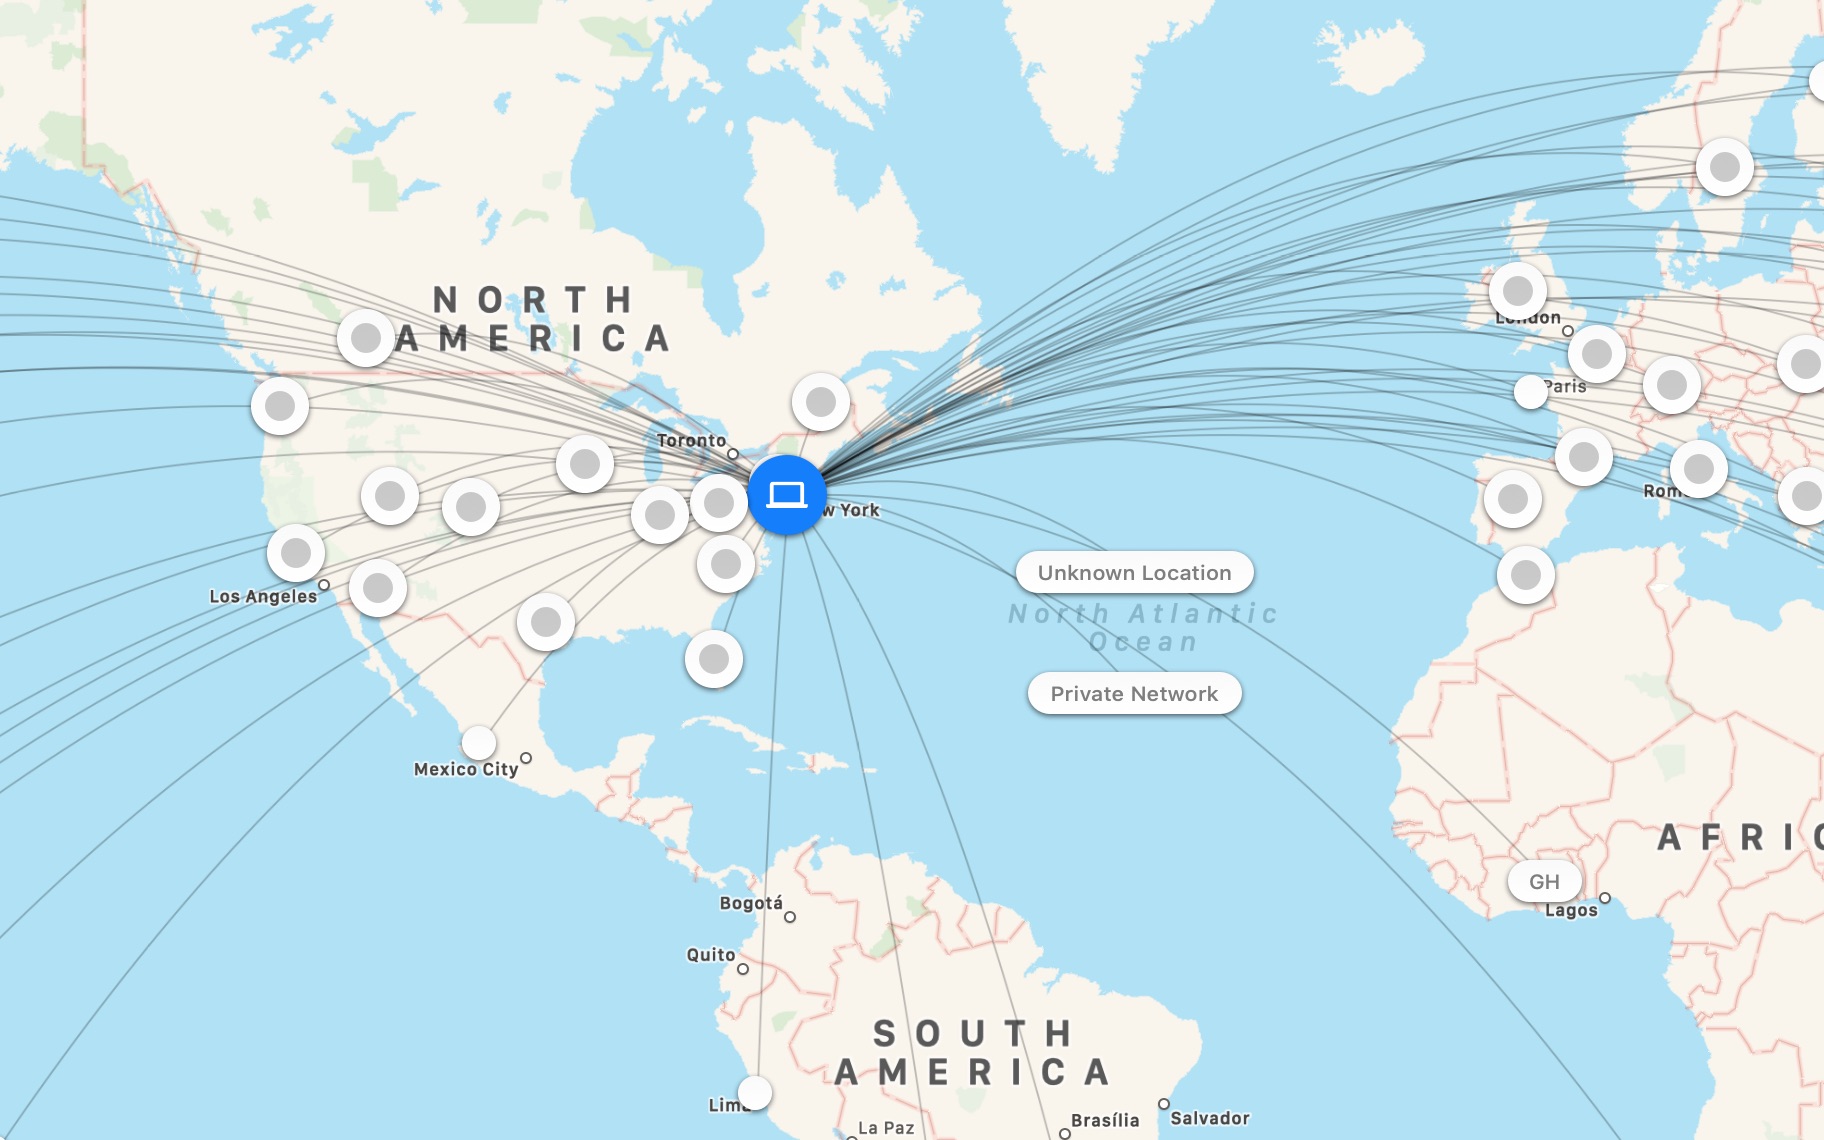
It is more than a firewall, though. It is also a real-time traffic monitor and capturing tool. The current version added a map that shows probable locations of the remote endpoints, and while it’s not all that actionable shows just how INTER the net really is.
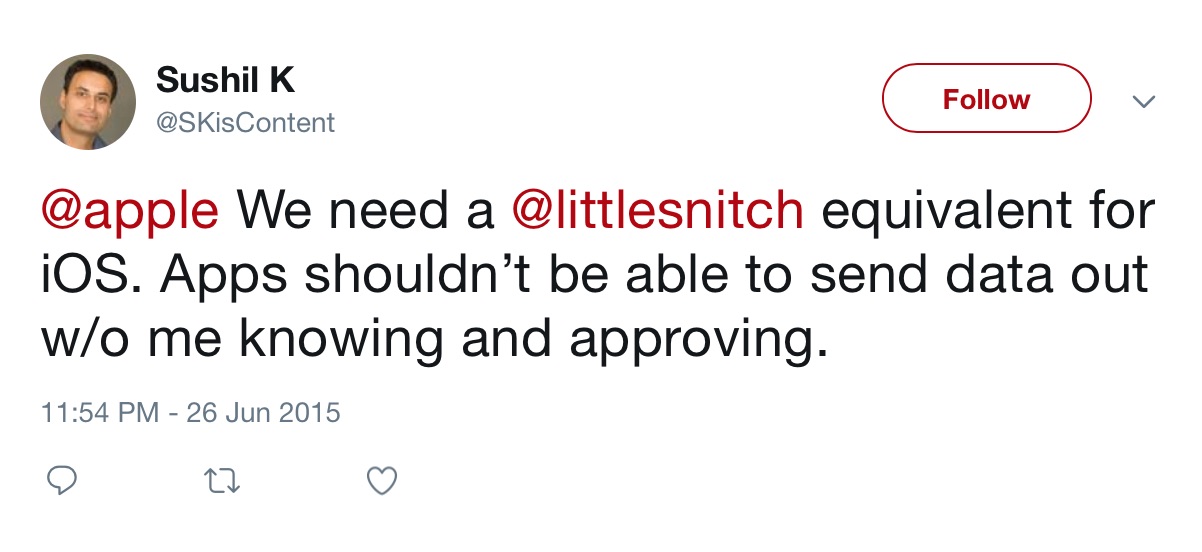
This is all very nice and I cannot imagine not having Little Snitch on my machine, but it has also bothered me for some time now that I do not have a similar tool or service for my iPhone (that’s me complaining in June 2015) . Any time I download a new app or browse a web site, I am left wondering to what other servers my device is connecting. Android users may not have the same issue, since a search in the Google Play Store for “firewall” results in several results, which may or may not actually be firewalls. However, there is no such app for iPhone because Apple does not allow it. So, much as I would love a Little Snitch for iPhone, so far I’ve been out of luck. I finally decided to solve the problem a different way.
No Satisfaction
Searching for “firewall” in the iOS App Store did bring up a few results for VPNs, and the thought of a VPN was the initial spark for my eventual solution. The issue with commercial VPNs, as security experts keep pointing out, is that they only shift exposure of, and jurisdiction over, network connections from the ISP to the VPN provider. The VPN provider still knows every server your device connects to. Therefore, if I were my own VPN provider, I would know all the places my iPhone connects to. Once I had a VPN, my thoughts went, I could easily collate the logs to see all my connections. In my mind I imagined a log file filled with identically structured rows that contained all the connection data, similar to web server access logs.
In the end I did successfully find a solution that exceeded my expectations, but it took a day of trials and tribulations. The VPN logs I’d imagined do not exist. I ended up using a combination of OpenVPN set up via Streisand and ntopng. I’m going to share a little about how it all came together, but you can probably figure it out on your own. What follows is not a fully detailed HOWTO, for that you can use the documentation provided by the individual components. I highly recommend reading those through once. I discuss some of the steps that are necessary to simplify the process and glue it all together.
It seemed obvious to me that the VPN server would have to be cloud-based so that I could move in and out of my home and still be able to connect. Streisand is a lovely tool that will install and fully configure several VPN servers fielding different VPN protocols on a cloud-hosted Linux machine. Among the protocols is OpenVPN, a GNU licensed product created in 2001.
Prerequisites
There are a few prerequisites to getting started. You can gather them as you go, and some of them are just things to think about, but if you don’t do it in advance, it will delay and draw out the process more, and possibly lead to errors.
- A cloud service account: You do not need to, and in fact should not, create a virtual machine instance. It’s only the account that you need.
- A domain name: This is necessary for getting a Let’s Encrypt SSL certificate. You may be able to get away without one, but then your device will complain about untrusted certificates and there will be extra steps to get your device to accept it.
- Decide whether to use MySQL: by default ntopng stores the data that it collects in memory and discards it after a few moments. So if you want to keep the history around longer, you will need to install MySQL. However, since Streisand sets up the smallest VM type that cloud providers offer (“micro” in the case of Amazon and Google), to install MySQL you will need to stop, reconfigure and restart the VM, which on both AWS and Google Cloud would mean that the IP address will change, unless you get a static IP. It also means replacing the IP address in all the artifacts that Streisand creates, such as VPN configuration files. There are several moving parts here.
- A private-public RSA key pair: This is covered in the prerequisites section on the Streisand GitHub page, but a point of clarification is that the streisand tool expects that whatever the private key file name is (say privkey), the public key file will have a “.pub” extension (so privkey.pub). Also the private key has to be in a read-only directory for ssh to work.
Become Virtually Private
When it actually comes to setting up the VPN, follow the Streisand instructions and give it a go. Some parts of the instructions are cloud-specific portions so I can’t talk about all of them. My experience setting up on Google Cloud was fairly seamless, even the part where I had to download the OAUTH credentials file.
Somewhere in the process you will need to log into your domain registrar’s site and configure the DNS servers for your domain name, then wait for that to take effect. Streisand will ask you if this is done before getting the SSL certificate from Let’s Encrypt. If you can dig your hostname and get the IP address of your new VM, then continue.
Once streisand completes, it will open a web page on your local file system with a username and password to the remote server. This is the point where you need to install MySQL before going any further. Follow the steps in the text box.
- Stop the VM from the cloud service console.
- Edit the VM settings and select a bigger capacity machine. On Google, “Small” is also probably too small, it won’t have enough memory for MySQL.
- Save the VM settings and restart it.
- Install mysql-server, create a database and a mysql user account.
- Edit /etc/ntopng/ntopng.conf and add the line
-F=mysql;localhost;<db_name>;<table_prefix>;<user>;<password>. The values in <> can be anything you want. - If you are lucky and the VM’s external IP address did not change when you restarted it, skip this step. Otherwise, log in via ssh and change directory to /var/www/streisand. Then execute the following commands to replace the old IP addresses and file names, where “old\.external\.ip\.address” and “new\.external\.ip\.address” would look something like “8\.8\.8\.8”.
find . -type f -exec sed -i 's/old\.external\.ip\.address/new\.external\.ip\.address/g' {} \;
find . -type f -exec rename 's/old\.external\.ip\.address/new\.external\.ip\.address/' {} \;
Snoop on Yourself
Now that you have hidden your traffic, it’s time to expose it all. As I mentioned, the VPN logs were not useful. By increasing the logging level of the OpenVPN service I was able to see when the client initiates a session, but not where the traffic was going. That’s when further searching lead to ntop. Ntop is supposed to be like the Unix command top but for the network, except that it is now a lot more, hence ntopng.
Download and install the ntopng stable package starting from this page. I suggest skipping pfring, nprobe, n2disk and nbox. If you plan to use MySQL then now is the time to install that as well.
This is where you have to make another decision. Streisand installs nginx as the web server, but ntopng causes the installation of Apache. You can keep nginx or disable it and enable Apache. I found that since I no longer needed the VPN setup/documentation pages, it was easiest to keep nginx in place and proxy the root URL to ntopng.
This is what you do. Edit /etc/nginx/sites-available/streisand and change
to
[pastacode lang=”markup” manual=”location%20%2F%20%7B%0A%20%20%20%20proxy_pass%20%20http%3A%2F%2F127.0.0.1%3A3000%3B%0A%7D” message=”” highlight=”” provider=”manual”/]Port 3000 is where ntopng is available by default. You can change this in the ntopng config file. That’s it. Restart nginx and reload the home page, it should now load the Ntop login page. Ntop is the web application interface to ntopng.
If you have trouble logging in to Ntop, you could also just disable the login by editing /etc/ntopng/ntopng.conf and adding -l=1 to the file. You will need to restart ntopng (systemctl restart ntopng). As long as you have the HTTP basic authorization in nginx or Apache, this is probably a safe choice.
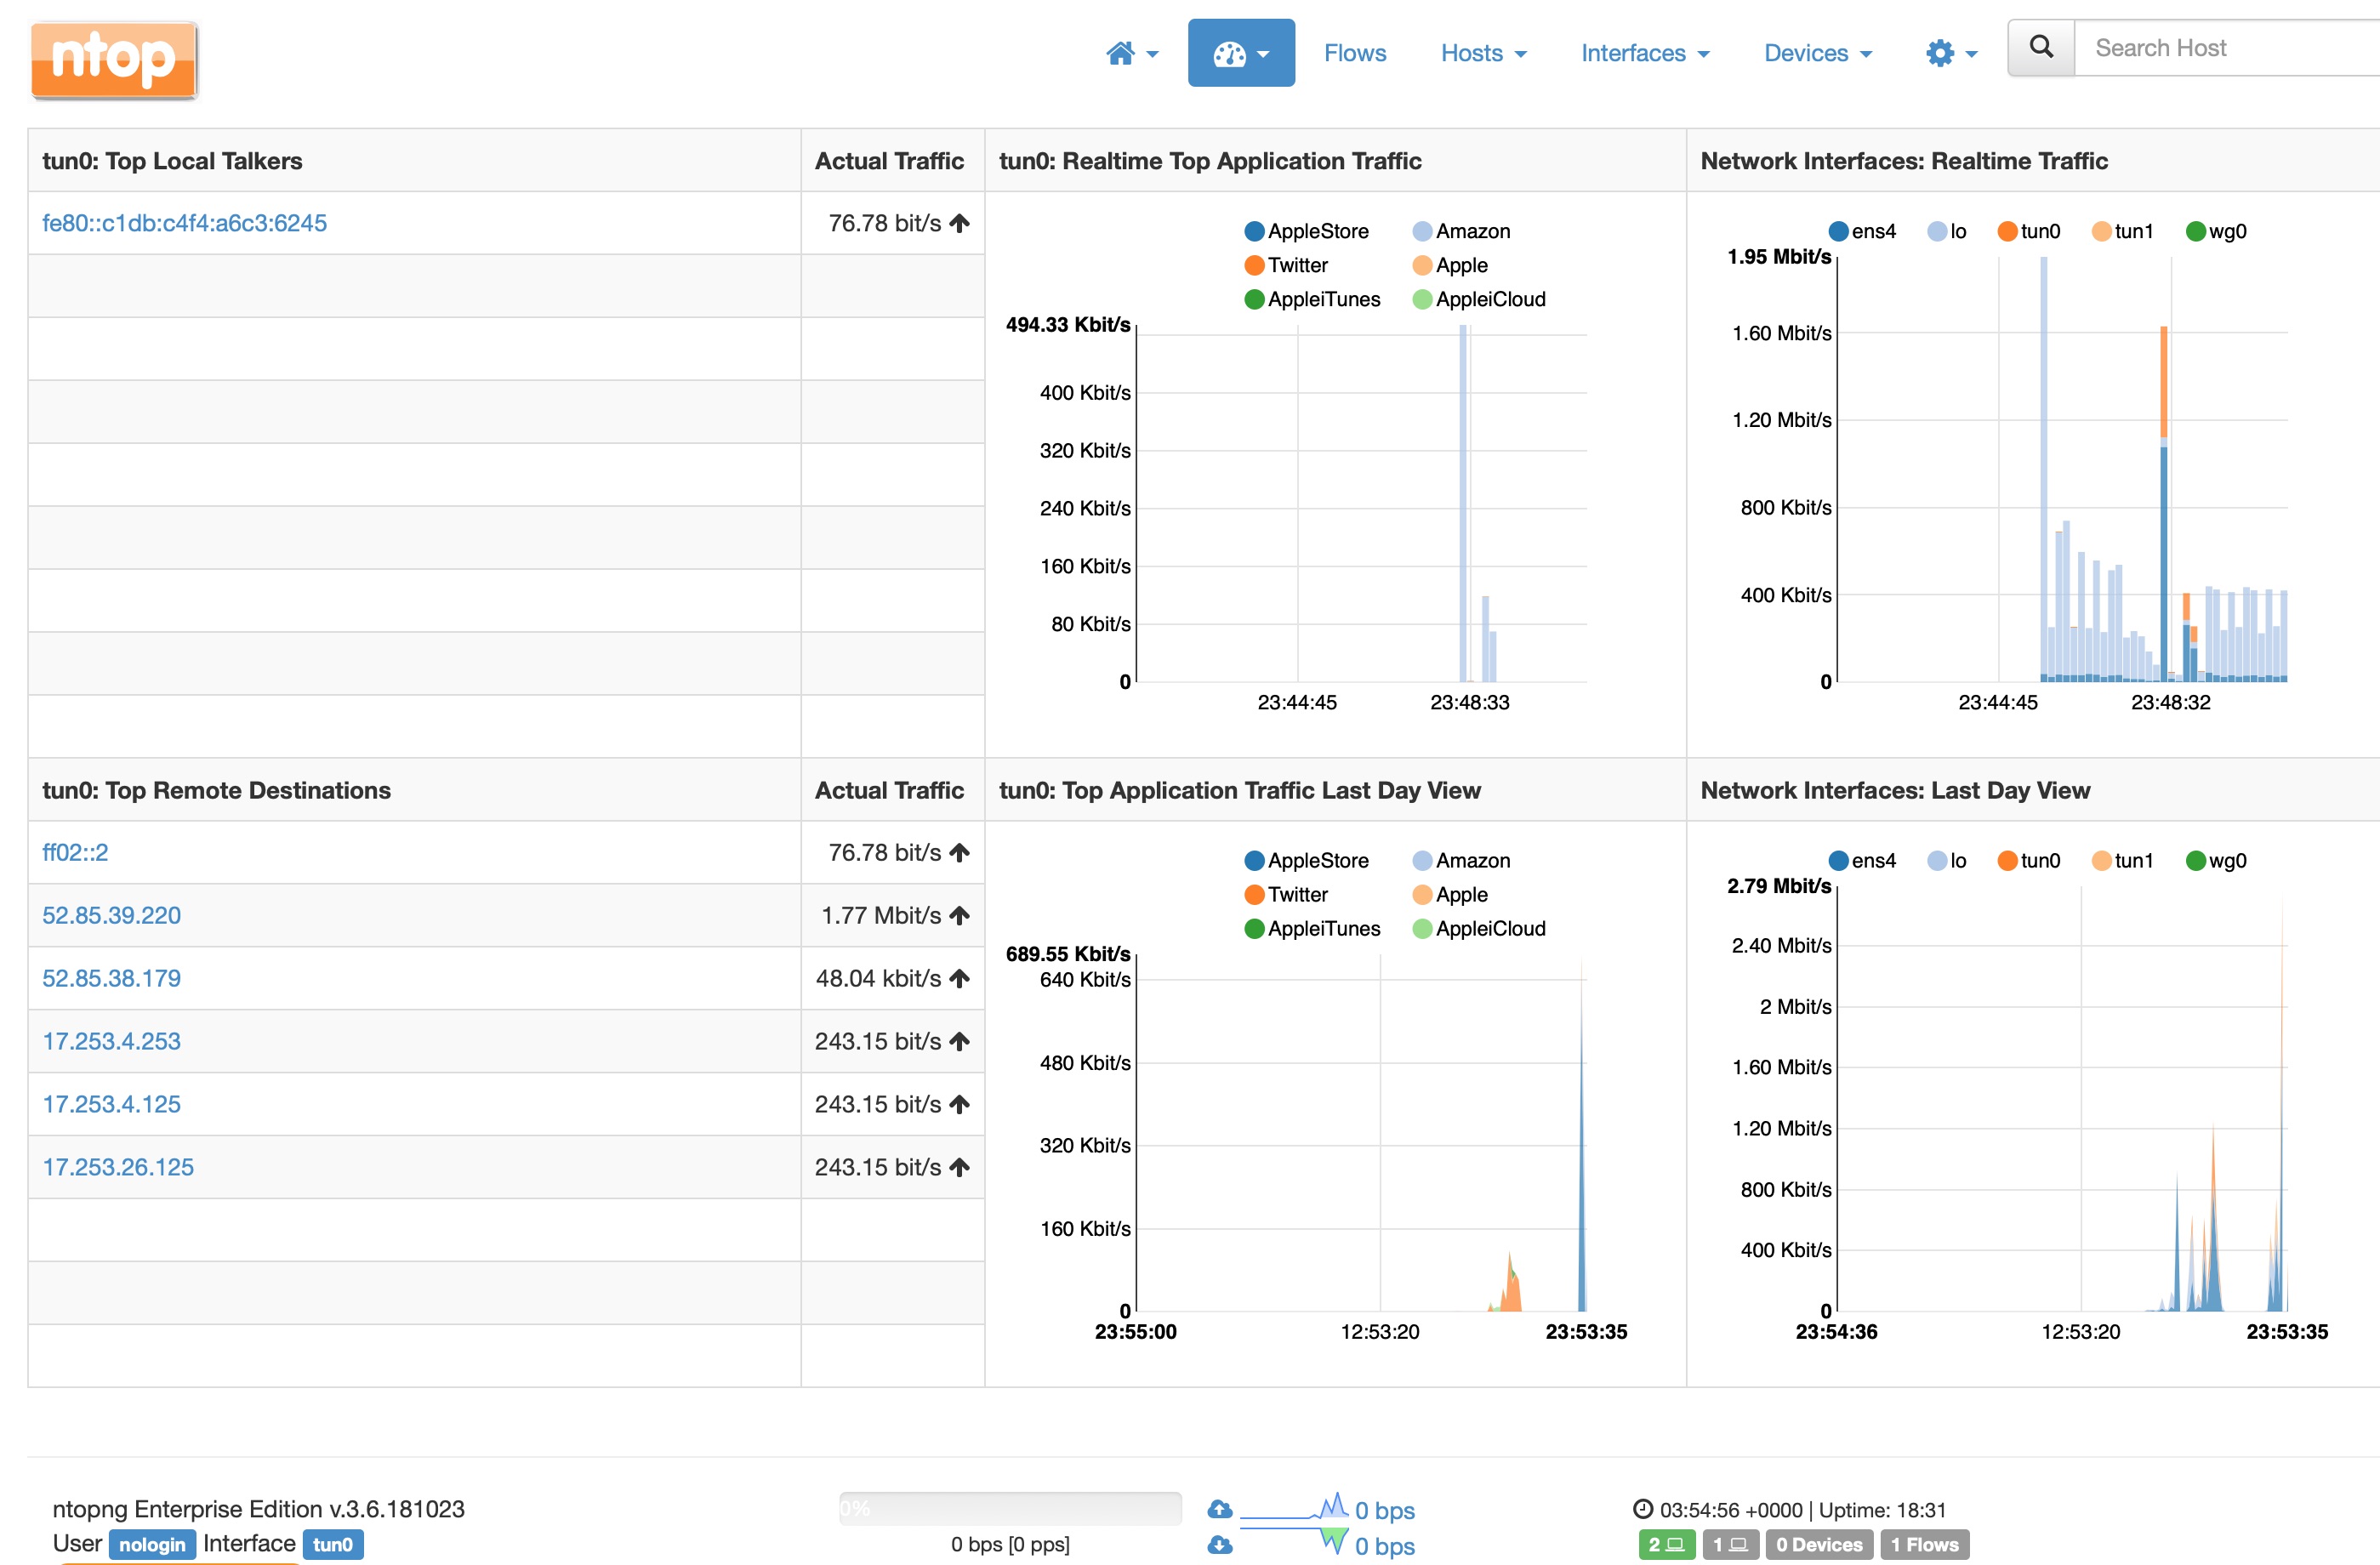
In order to see your device’s traffic, head over to the Interfaces menu and select the interface that the VPN is using. It is probably tun0, it may be tun1, depending on which protocol you chose. Then click on Flows. You should now see all the connections from your device in real time. The IP address under Client is your device’s IP address inside the VPN and the address 10.8.0.1 or similar will be the server’s internal VPN address.
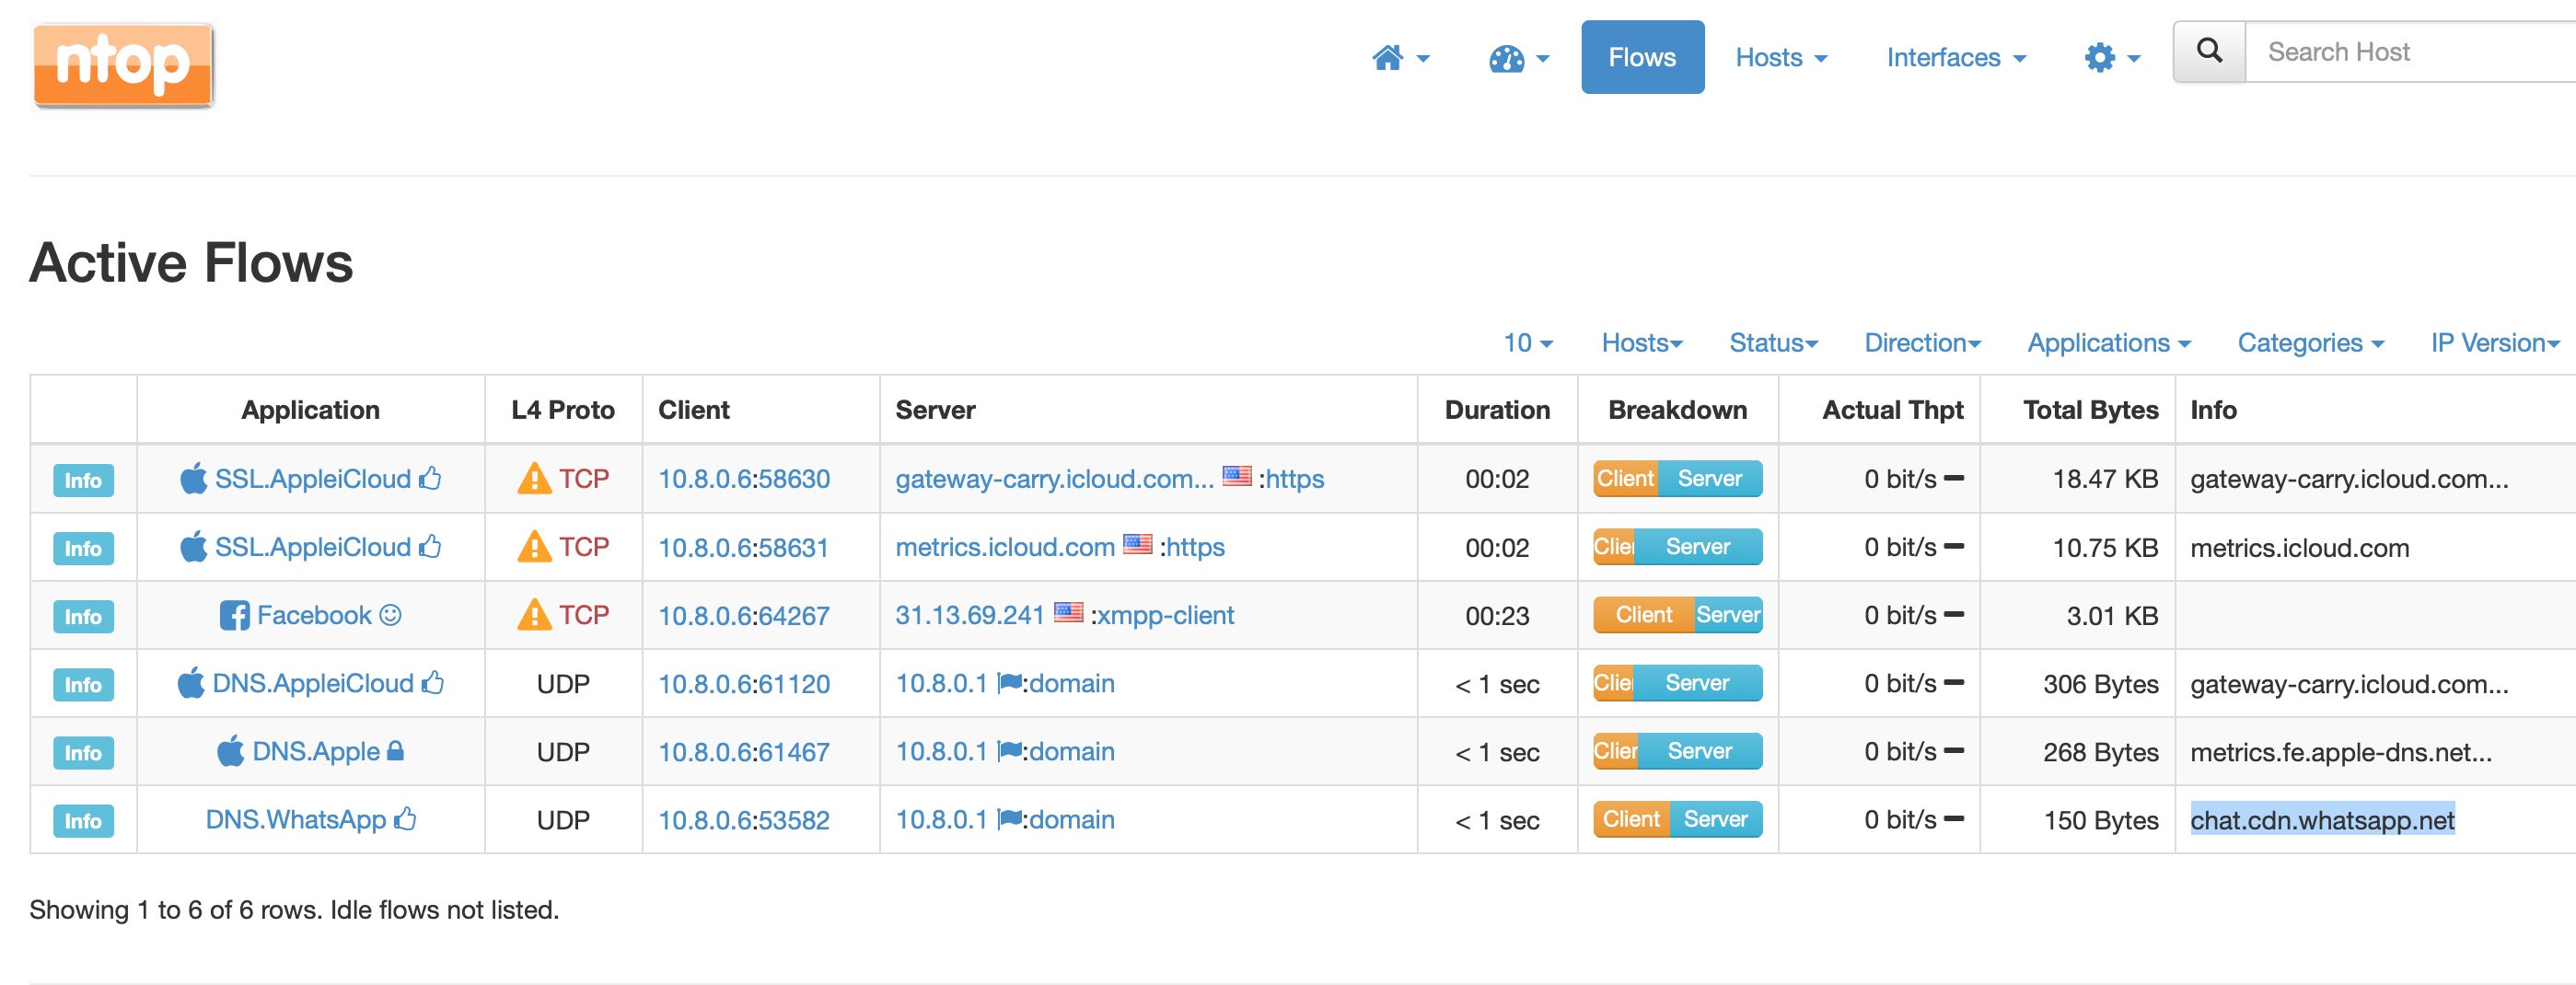
The picture above is a fairly typical situation where there is some traffic due to Apple services, and I’m active on WhatsApp and Twitter. This next picture shows the connections when I browse Wired.com.
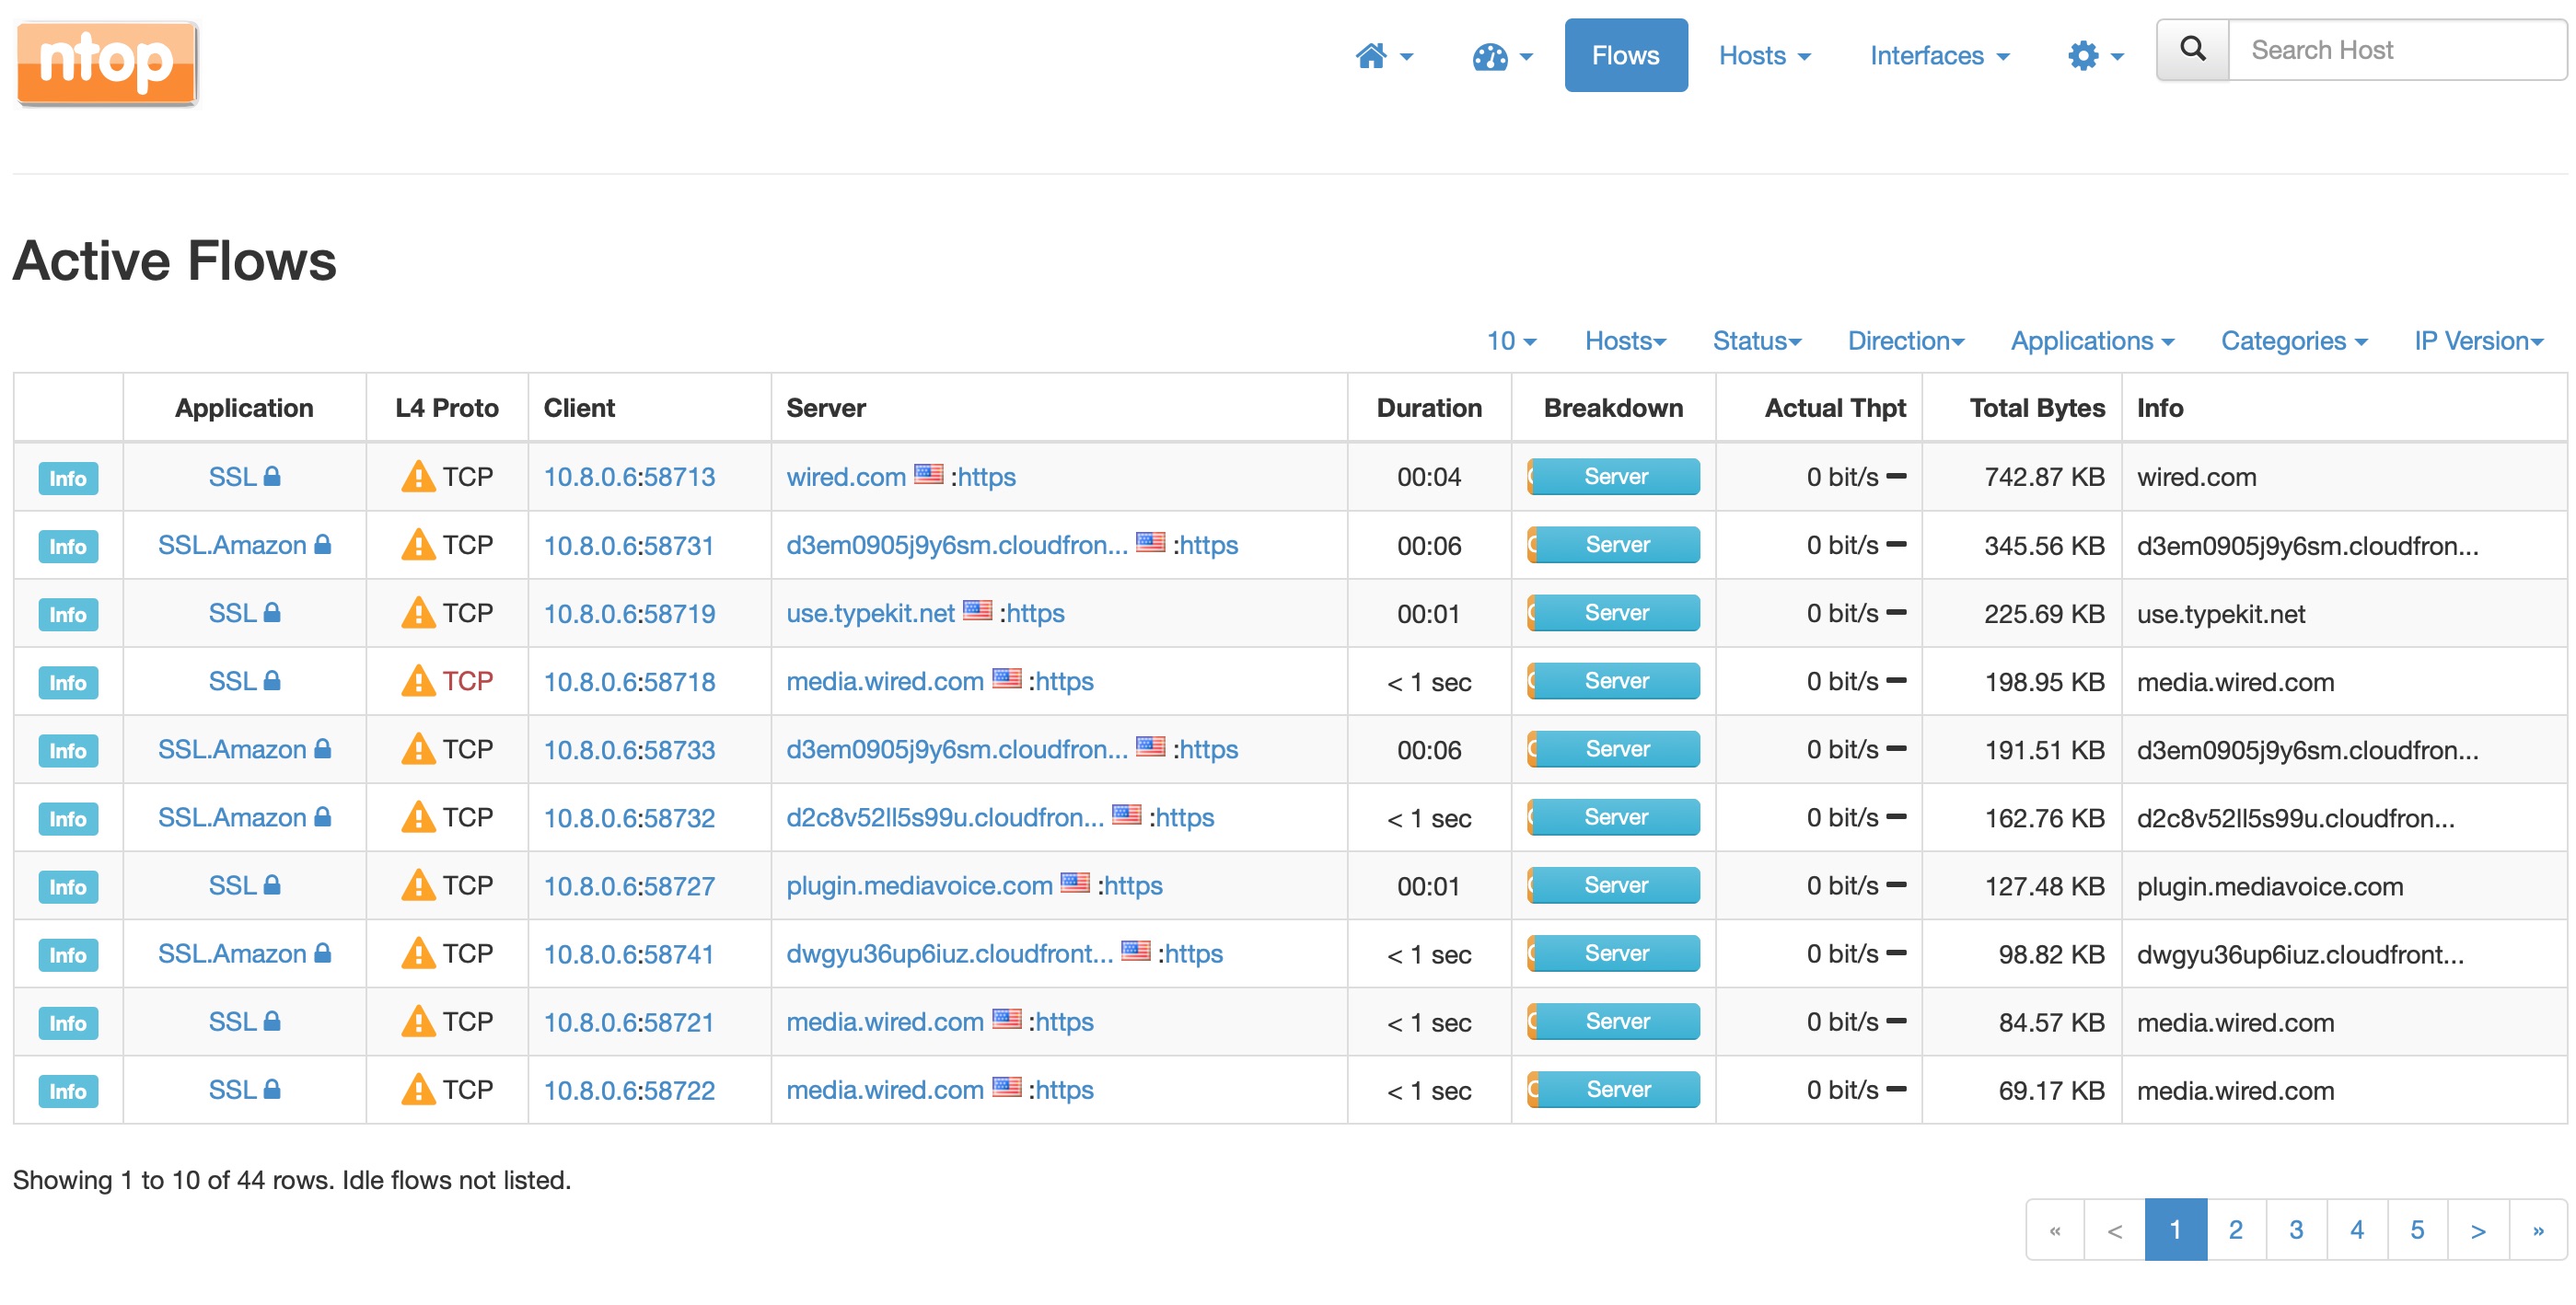
That’s a lot of connections! It’s the typical news web page. This is actually less that it would be otherwise because of my ad-blocker. The next one shows an app download in progress.
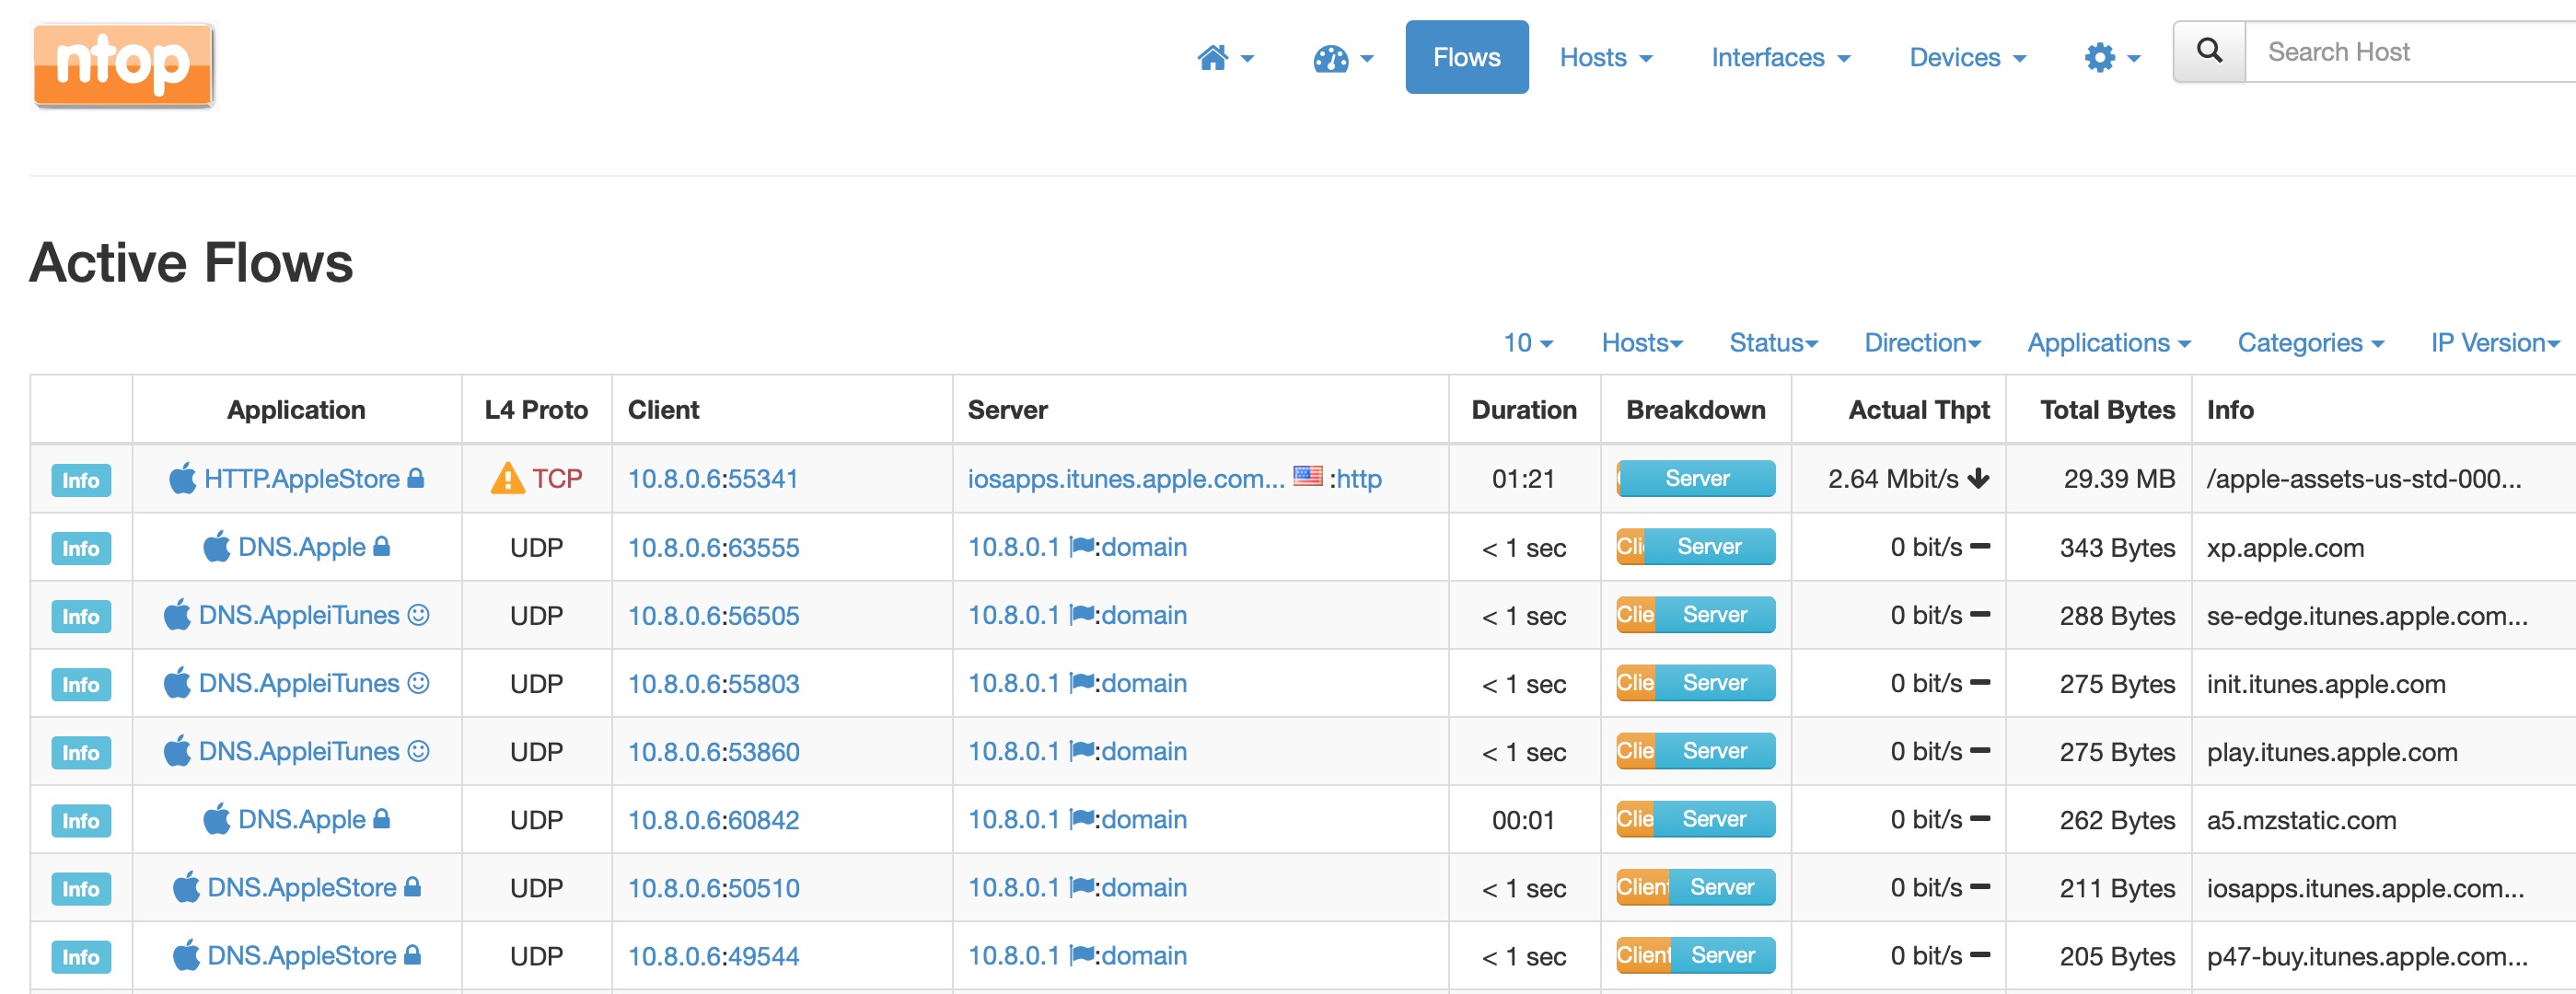
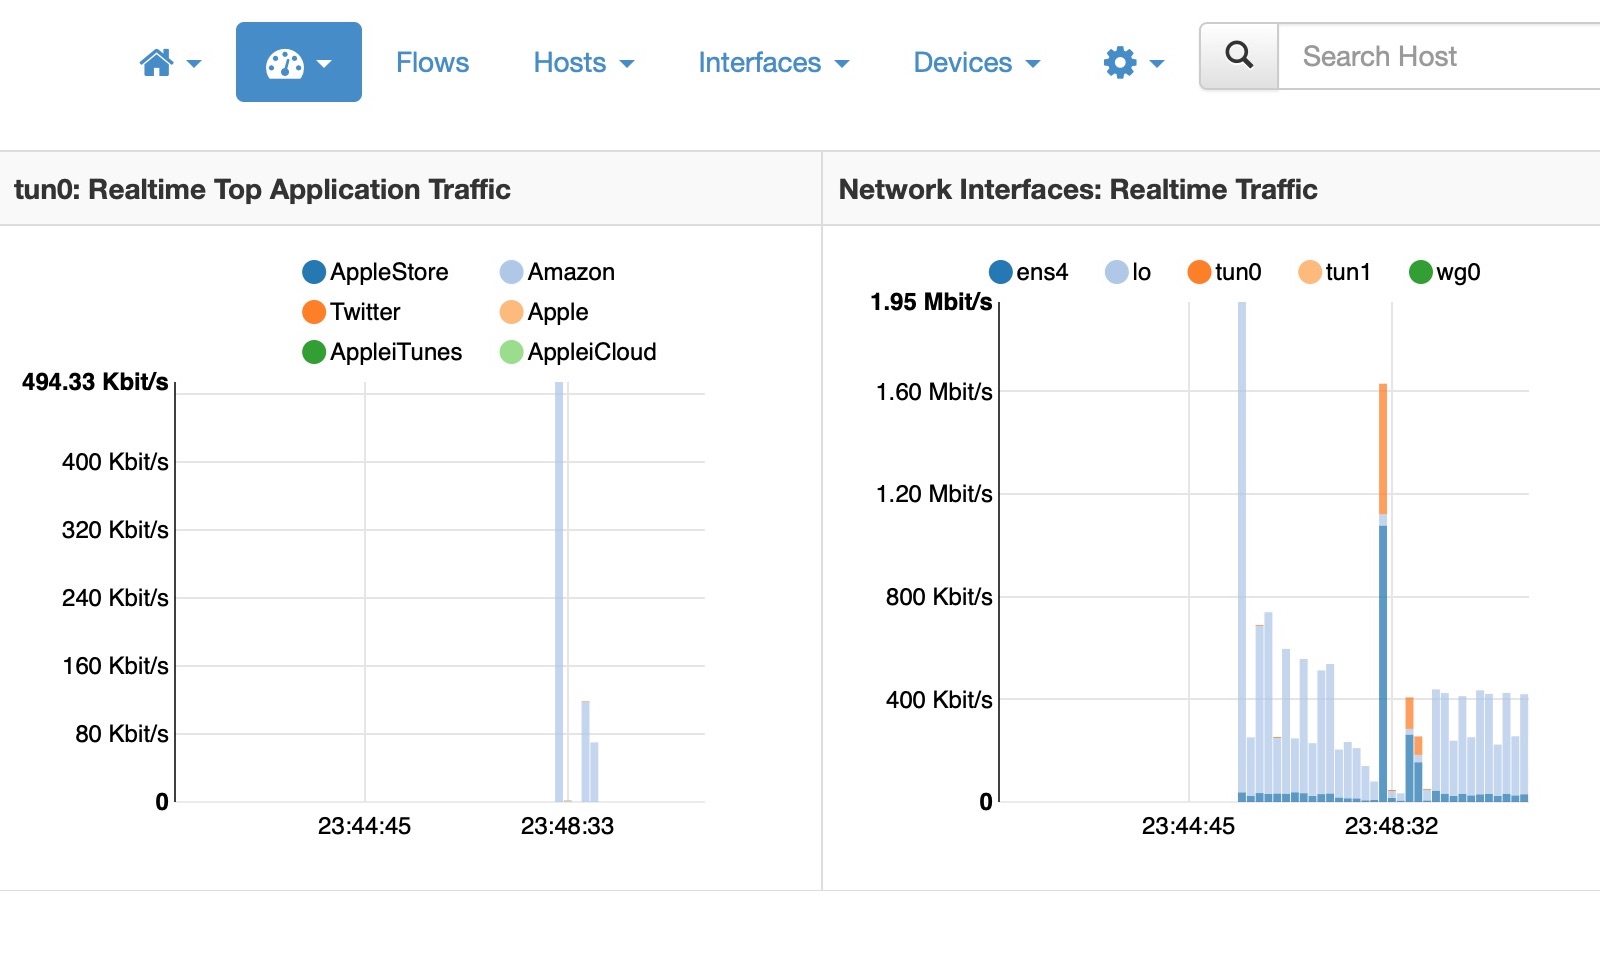
Finally Ntop tries to guess what applications might be running based on the host addresses, I guess. This is a less cluttered view.
I’m only just digging into Ntop and the features it offers. So far it serves my purpose of knowing what connections my phone is making.
Ideally, in order to match the capabilities of a firewall I would like to be able to create traffic filter rules in a quick and simple manner. In AWS and Google Cloud this can be done through the console pages, but it’s not as intuitive as clicking on a particular connection and selecting “block”. If you have any suggestions, let me know!